
Honeywell T1 Installation & Configuration: A Comprehensive Guide
Welcome! This detailed manual provides step-by-step instructions for a smooth Honeywell T1 thermostat installation and optimal system configuration for enhanced home comfort.

The Honeywell T1 is a smart, Wi-Fi enabled thermostat designed to provide convenient and efficient control of your home’s heating and cooling systems. This thermostat learns your preferences and adjusts temperatures automatically, potentially saving you energy and money.
Its sleek design and intuitive touchscreen interface offer a modern aesthetic, while the Honeywell Home app allows for remote access and control from anywhere. This guide will walk you through the entire installation process, from preparing your system to configuring advanced features, ensuring a seamless experience.
Package Contents & Initial Inspection
Upon opening the box, verify that all components are present. Your Honeywell T1 package should include: the T1 thermostat display unit, the T1 baseplate, mounting screws and wall anchors, wire labels, and this installation guide.
Carefully inspect each item for any signs of damage during shipping. If anything is missing or appears damaged, do not proceed with the installation. Contact Honeywell Support immediately for assistance and replacement parts before continuing.
Safety Precautions & Warnings
Electrical Shock Hazard: Always disconnect power to your HVAC system at the breaker box before beginning any wiring. Failure to do so could result in serious injury or death.
Professional Installation Recommended: If you are uncomfortable working with electrical wiring, consult a qualified HVAC technician. Improper installation can damage your system and void the warranty. Keep this manual for future reference and ensure proper disposal of packaging materials.

Pre-Installation Checklist
Before you start, verify your HVAC system is compatible with the Honeywell T1. Gather all necessary tools – screwdriver, wire strippers, level, and potentially a drill. Crucially, turn off power to your HVAC system at the breaker. Carefully label existing wires before disconnecting them from the old thermostat. Confirm you have a stable Wi-Fi connection for setup. Review all safety precautions!
System Compatibility Verification
The Honeywell T1 is generally compatible with most 24V heating and cooling systems, including forced air, heat pump, and radiant heat. However, it’s not compatible with high-voltage systems (110V/240V) or millivolt systems. Check your existing thermostat’s wiring; if you see thicker, colored wires, it’s likely high-voltage. Consult a qualified HVAC technician if unsure about compatibility before proceeding with installation.
Required Tools & Materials
For a successful Honeywell T1 installation, you’ll need a few essential tools and materials. These include a Phillips head screwdriver, a small flathead screwdriver, wire strippers, a level, a pencil, and masking tape. Additionally, ensure you have the Honeywell T1 thermostat kit, including the baseplate and display unit, and potentially wire labels for easy identification during the process. Safety glasses are also recommended.
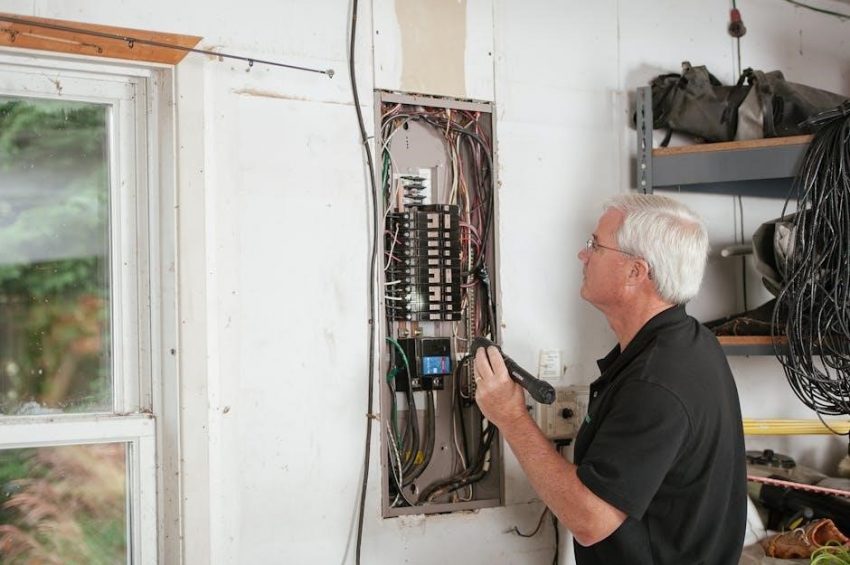
Turning Off Power to the HVAC System
Before commencing any wiring work, absolutely disconnect power to your heating, ventilation, and air conditioning (HVAC) system at the breaker box. Locate the breaker labeled “Furnace” or “HVAC” and switch it to the “OFF” position. Confirm the power is off by testing the existing thermostat; the screen should be blank. This crucial safety step prevents electrical shock and potential damage to your system and the new thermostat.

Removing the Old Thermostat

Carefully remove your existing thermostat. This process typically involves removing a faceplate, often by gently prying it off or releasing clips. Before disconnecting any wires, it’s vital to meticulously document their current connections. Take a clear photograph of the wiring setup and/or use the provided labeling stickers (detailed in the next section) to identify each wire. Proceed cautiously to avoid damaging the wires or the wall.
Labeling Existing Wires – Critical Step!
Accurate wire labeling is paramount for a successful installation. Use the provided stickers, or small pieces of masking tape, to clearly mark each wire before disconnecting anything. Match the labels to the terminal designations on your old thermostat (R, C, W, Y, G, etc.). Double-check your labeling! A mislabeled wire can cause significant issues. If unsure about a wire’s function, consult a qualified HVAC technician before proceeding. Proper labeling saves time and prevents errors.
Disconnecting the Old Thermostat Wires
With the power OFF and wires meticulously labeled, carefully disconnect each wire from the old thermostat’s terminals. Use a small screwdriver to loosen the screws, and gently pull each wire free. Avoid touching any bare wires to prevent shorts. As you disconnect each wire, re-verify the label against the wire’s position. Keep the wires from falling back into the wall – a small piece of tape can help secure them. Document the original wiring configuration with a photo for reference.
Removing the Old Thermostat Baseplate
After disconnecting all wires, remove the screws securing the old thermostat’s baseplate to the wall. These are typically located at the top, bottom, or sides of the plate. Gently pull the baseplate away from the wall; it may be held in place by adhesive or friction. Inspect the wall for any damage or paint peeling. If necessary, make minor repairs before installing the new T1 baseplate. Dispose of the old baseplate responsibly.
Installing the T1 Baseplate
Begin by positioning the T1 baseplate on the wall where the old thermostat was located. Ensure it covers the existing mounting holes, or use the provided anchors for new holes. Use a level to confirm the baseplate is perfectly horizontal – crucial for accurate temperature readings. Secure the baseplate with the supplied screws, tightening them firmly but avoiding over-tightening. Verify the baseplate is stable and flush against the wall before proceeding.
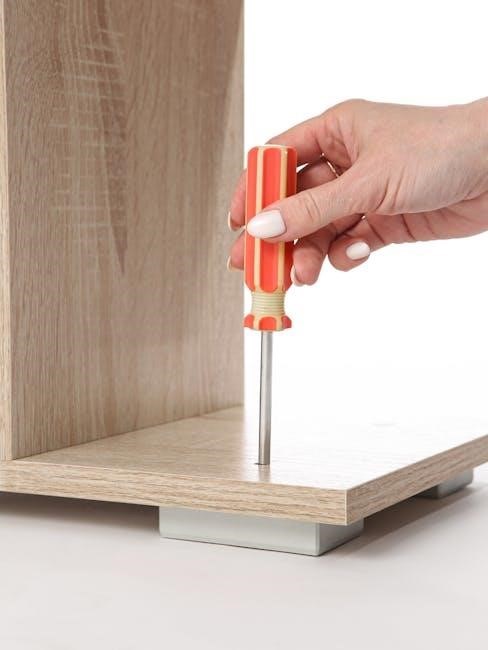
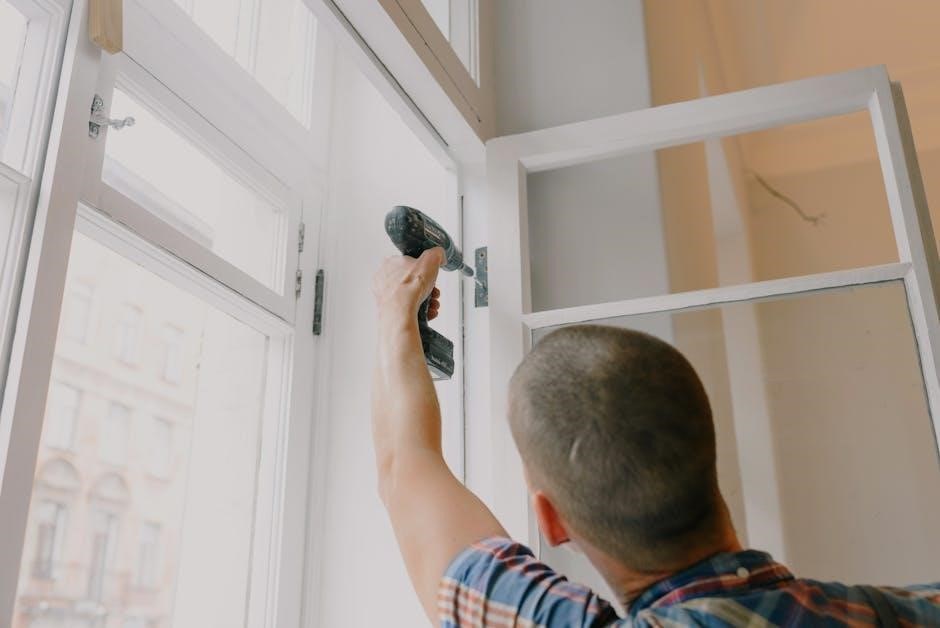
Mounting the Baseplate to the Wall
First, align the T1 baseplate with the existing holes, or mark new locations using a pencil. If drilling new holes, use a drill bit appropriate for your wall type. Insert the provided wall anchors for a secure hold, tapping them gently with a hammer. Position the baseplate and insert screws, tightening until snug – do not overtighten. Double-check that the baseplate is firmly attached and doesn’t wobble, ensuring a stable foundation for the thermostat.
Leveling the Baseplate for Accurate Readings
Accurate temperature readings depend on a level baseplate! Use a small bubble level, placing it on top of the baseplate in both horizontal and vertical directions. If the bubble isn’t centered, gently loosen the mounting screws and adjust the baseplate’s position. Retighten the screws once level is achieved. Confirm leveling again to ensure precision. A properly leveled baseplate guarantees reliable temperature sensing and optimal thermostat performance for consistent comfort.
Wiring the Honeywell T1 Thermostat
Carefully connect the wires to the corresponding terminals on the T1 baseplate, referencing your labeled wires from the old thermostat. Ensure each wire is securely inserted into its designated terminal – a loose connection can cause malfunctions. Double-check your wiring against the diagrams provided, specific to your HVAC system type (gas, electric, or heat pump). Incorrect wiring can damage your system; if unsure, consult a qualified HVAC technician.
Connecting the Wires – Terminal Guide (R, C, W, Y, G, etc.)
R (Power): Supplies 24V power. C (Common): Returns power, often required for Wi-Fi. W (Heat): Activates heating. Y (Cooling): Activates cooling. G (Fan): Controls the fan. Note: Some systems may have additional wires (O/B for reversing valve, AUX/E for auxiliary heat). Always refer to your system’s wiring diagram and the Honeywell T1’s specific labeling for accurate connections.
Common Wiring Configurations (Gas, Electric, Heat Pump)
Gas Systems: Typically use R, C, W, Y, and G wires. Electric Systems: Often utilize R, C, W, and Y. May require a bridge wire if no C wire exists. Heat Pump Systems: Employ R, C, Y, G, and often an O/B wire for reversing valve control. Important: Wiring varies significantly. Always consult your HVAC system’s documentation and the Honeywell T1 wiring diagram for precise connections.
Troubleshooting Wiring Issues – Common Mistakes
Misidentified Wires: Incorrectly labeled wires are a frequent issue. Double-check each connection against your old thermostat’s wiring and the system documentation. Loose Connections: Ensure all wires are securely fastened to the terminals. Missing C-Wire: A common problem; a C-wire adapter may be necessary. Short Circuits: Verify wires aren’t touching each other. Incorrect Terminal: Confirm wires are connected to the correct terminals as per the wiring diagram.
Attaching the T1 Display Unit
Carefully align the T1 display unit with the mounted baseplate. Gently press the display onto the baseplate until it clicks securely into place. Avoid excessive force, which could damage the connectors. Ensure a flush fit – no gaps should be visible. Verify the connection by lightly wiggling the display; it shouldn’t move. A proper connection is crucial for functionality. Power is off during this step for safety.
Powering On & Initial Setup
Restore power to your HVAC system at the breaker box. The T1 display should illuminate, initiating the startup sequence. Follow the on-screen prompts to begin the initial setup. You’ll be guided through language selection, date and time configuration, and system type identification. Accurate system type selection is vital for correct operation. The thermostat may automatically begin searching for a Wi-Fi network. Ensure your home network is active and ready for connection.
Connecting to Wi-Fi
Access the Wi-Fi settings on the T1 thermostat’s display. Select your home network from the list of available networks. Enter your Wi-Fi password carefully, ensuring correct capitalization. The thermostat will attempt to connect; this may take a few moments. A successful connection is indicated by a Wi-Fi symbol on the display. If the connection fails, double-check your password and network settings. Utilize the Honeywell Home app for alternative connection methods and troubleshooting.
Using the Honeywell Home App
Download and install the Honeywell Home app from your device’s app store. Create an account or log in if you already have one. Add your T1 thermostat by following the in-app instructions – typically involving scanning a QR code or manually entering the device ID. The app allows remote control, scheduling, geofencing, and access to energy reports. Explore the app’s features to customize your thermostat settings and optimize your home’s comfort and energy efficiency.
Troubleshooting Wi-Fi Connection Problems
Verify your Wi-Fi network is functioning correctly with other devices. Ensure the T1 is within range of your router; try moving it closer temporarily. Double-check the password entered in the Honeywell Home app. Restart both the thermostat and your Wi-Fi router. Confirm your router’s security settings (WPA2 is recommended). If issues persist, consult Honeywell’s support website for specific error codes and solutions, or reset the T1’s network settings.
Configuring System Settings
Access the settings menu via the T1’s touchscreen or the Honeywell Home app. Set the correct date and time for accurate scheduling. Define your heating and cooling modes – auto, heat only, cool only, or off. Choose your preferred temperature scale, Fahrenheit or Celsius. Customize display settings like brightness and screen timeout. Explore advanced options for fan control and swing settings to personalize your comfort experience.
Setting the Date & Time
Navigate to the ‘Date & Time’ setting within the thermostat’s menu, accessible through the touchscreen interface or the Honeywell Home app. Ensure accuracy by verifying against a reliable time source. Adjust the month, day, and year as needed. Set the hour and minute, paying attention to AM/PM designation. Confirm your selections to save the changes. Correct date and time settings are crucial for proper scheduling and automated features.
Defining Heating & Cooling Modes
Access the ‘System Mode’ setting on your Honeywell T1. Select from ‘Heat,’ ‘Cool,’ ‘Auto,’ and ‘Off’ modes to match your needs. ‘Heat’ activates heating, ‘Cool’ activates cooling, and ‘Auto’ switches between them based on setpoints. ‘Off’ disables both. Customize preferences for each mode, like temperature differentials. Proper mode selection ensures efficient and comfortable climate control throughout the year.
Setting Temperature Scales (Fahrenheit/Celsius)
Navigate to the ‘Preferences’ or ‘Settings’ menu on your Honeywell T1 thermostat. Locate the ‘Temperature Scale’ option and select your preferred unit – either Fahrenheit (°F) or Celsius (°C). This setting affects all displayed temperatures and setpoints. Confirm your selection to apply the change. Ensure consistency with your personal preference and local weather reporting. This simple adjustment personalizes your thermostat experience for optimal readability.
Scheduling & Geofencing
Maximize energy savings and comfort with the Honeywell T1’s scheduling and geofencing features. Create custom schedules within the Honeywell Home app, defining different temperatures for various times of day and days of the week. Enable geofencing to automatically adjust the thermostat based on your location – heating or cooling activates as you approach, and pauses when you leave. Fine-tune settings for personalized comfort and reduced energy consumption.
Creating Custom Schedules
Within the Honeywell Home app, navigate to the scheduling section to build personalized heating and cooling plans. Define specific time periods – wake, leave, return, and sleep – and assign desired temperatures for each. Easily copy schedules to multiple days for convenience. Utilize the “Hold” function for temporary overrides. Experiment with different settings to find the optimal balance between comfort and energy efficiency, tailoring the schedule to your lifestyle.
Utilizing Geofencing for Automatic Adjustments
Geofencing leverages your smartphone’s location to automatically adjust the thermostat. Enable the feature within the Honeywell Home app and define a virtual perimeter around your home. When you exit the geofence, the thermostat can switch to an energy-saving away mode. Upon re-entry, it returns to your preferred comfort settings. Customize the geofence radius and temperature adjustments for personalized automation, maximizing savings and convenience.
Advanced Features & Customization
Unlock the full potential of your Honeywell T1 with its advanced features. Explore smart alerts for filter change reminders or extreme temperature warnings. Dive into energy savings reports, analyzing usage patterns for optimization. Customize display settings, including brightness and themes. Utilize vacation mode for extended absences. Integrate with other smart home devices for a truly connected experience, enhancing comfort and control.
Smart Alerts & Notifications
Stay informed with the Honeywell T1’s intelligent alert system. Receive notifications directly to your smartphone via the Honeywell Home app. Configure alerts for critical events like extreme high or low temperatures, potentially preventing frozen pipes or system strain. Set reminders for routine maintenance, such as filter replacements, ensuring optimal performance. Customize alert sensitivity to match your preferences, providing peace of mind and proactive system management.
Energy Savings Reports & Analysis

Monitor your energy consumption with the Honeywell T1’s detailed reporting features. Access historical data through the Honeywell Home app, visualizing your heating and cooling patterns. Analyze usage trends to identify potential areas for improvement and cost reduction. Receive personalized insights and recommendations for optimizing your schedule and settings. Track savings over time, demonstrating the positive impact of your smart thermostat investment. Gain control over your energy bills!
Troubleshooting Common Issues
Encountering problems? This section addresses frequent Honeywell T1 issues. If the thermostat won’t power on, check wiring and the C-wire connection. For inaccurate readings, ensure proper leveling and avoid direct sunlight. Connectivity issues? Verify Wi-Fi signal strength and router compatibility. Consult the Honeywell Home app for error code explanations. Restarting the thermostat often resolves minor glitches. Refer to the FAQ or contact support for persistent problems.
Thermostat Not Powering On
Is your T1 displaying a blank screen? First, double-check the breaker supplying power to your HVAC system. Verify the C-wire connection at both the thermostat and furnace/air handler – this is crucial for consistent power. Inspect all wiring for loose connections or corrosion. Ensure the baseplate is securely mounted and making proper contact. If using batteries, replace them with fresh ones. Consult wiring diagrams to confirm correct wire placement.
Incorrect Temperature Readings
Is your T1 reporting inaccurate temperatures? Begin by ensuring the thermostat isn’t directly exposed to sunlight, drafts, or heat-generating appliances. Verify proper leveling of the baseplate – an unlevel installation impacts readings. Check for obstructions near the thermostat’s vents. Calibrate the temperature within the settings menu of the Honeywell Home app. Confirm correct wiring, particularly the sensor wires if applicable. Allow sufficient time for the thermostat to stabilize after installation.
Connectivity Problems
Experiencing Wi-Fi issues with your T1? First, confirm your home network is functioning correctly. Restart your router and modem. Ensure the thermostat is within range of your Wi-Fi signal – consider a range extender if needed. Double-check the Wi-Fi password entered during setup. Verify the Honeywell Home app is updated to the latest version. Temporarily disable any firewall settings that might be blocking the connection. Restart the thermostat itself to refresh its network connection.
Resetting the Honeywell T1 Thermostat
Need to restore your T1 to factory defaults? Access the thermostat’s settings menu via the touchscreen. Navigate to the “About” or “Settings” section – the exact location may vary slightly depending on firmware. Select “Reset” or “Factory Reset”. Confirm your decision as this will erase all personalized settings. Allow the thermostat to reboot. You’ll then need to re-establish Wi-Fi connectivity and reconfigure your preferences. This is useful for troubleshooting persistent issues or preparing the thermostat for a new user.

Firmware Updates & Maintenance
Keep your T1 operating at peak performance! The thermostat automatically checks for firmware updates when connected to Wi-Fi. Accept prompts to download and install these updates – they often include bug fixes and new features. Regularly clean the display with a soft, dry cloth. Avoid harsh chemicals. Periodically verify wiring connections (power off first!). Check the Honeywell Home app for maintenance reminders and diagnostic tools. Consistent updates ensure optimal functionality and security.

Honeywell Home App Overview
The Honeywell Home app is your central control hub! Download it from your app store and create an account. The app allows remote temperature adjustments, scheduling, and geofencing setup. Explore the dashboard for current conditions and energy usage reports. Access advanced settings for customized comfort. Manage multiple thermostats from a single account. Receive alerts for system issues and temperature extremes. The app simplifies T1 control and provides valuable insights into your home’s energy consumption.
Voice Control Integration (Amazon Alexa, Google Assistant)
Enjoy hands-free control! The Honeywell T1 seamlessly integrates with Amazon Alexa and Google Assistant. Enable the Honeywell Home skill/action within your voice assistant app. Link your Honeywell Home account for voice commands. Simply ask to adjust the temperature, set schedules, or check current settings. Ensure your T1 is connected to Wi-Fi for optimal performance. Voice control adds convenience and accessibility to your smart home experience, enhancing comfort and energy management.
Understanding Error Codes
Decoding system messages! The Honeywell T1 displays error codes to indicate potential issues. Consult the complete error code list within the Honeywell Home app or the online support documentation. Common codes relate to wiring problems, Wi-Fi connectivity, or HVAC system faults. Note the specific code and refer to the troubleshooting guide. Addressing error codes promptly ensures optimal thermostat function and prevents potential damage to your HVAC system. Don’t ignore these vital system indicators!
Warranty Information & Support
Protecting your investment! The Honeywell T1 thermostat is covered by a one-year limited warranty against manufacturing defects. Retain your proof of purchase for warranty claims. For comprehensive support, visit the Honeywell Home website for FAQs, troubleshooting guides, and downloadable resources. Contact Honeywell support directly via phone or online chat for personalized assistance. Extended warranties may be available; inquire at the point of purchase.
Disposal & Recycling
Responsible electronics handling! Please do not dispose of your old thermostat with general household waste. Electronic components contain materials requiring proper recycling. Check with your local municipality for designated e-waste collection sites or recycling programs. Honeywell encourages environmentally conscious disposal practices. Packaging materials are also recyclable; please separate cardboard and plastics accordingly. Contributing to a sustainable future is everyone’s responsibility.
Frequently Asked Questions (FAQ)
Q: What if my wiring doesn’t match the diagram? A: Consult a qualified HVAC technician. Q: Can I use the T1 with a millivolt system? A: No, the T1 is not compatible. Q: How do I reset the thermostat? A: See the “Resetting the Honeywell T1 Thermostat” section. Q: Does the T1 work with a zone system? A: Yes, with appropriate configuration. Q: Where can I find additional support? A: Visit Honeywell’s website or contact support.
Appendix: Wiring Diagrams for Various Systems
Gas Furnace: Standard wiring utilizes R, C, W, Y, and G terminals. Electric Furnace: Typically employs R, C, W2, Y, and G connections. Heat Pump: Requires O/B terminal alongside R, C, Y, and G. Dual Fuel Systems: Utilize W1 for gas and W2 for electric heat. Millivolt Systems: Not supported. Always verify compatibility and consult a professional if unsure. Diagrams illustrate common configurations; your setup may vary.
Contact Information for Honeywell Support
For technical assistance, visit the Honeywell Home support website at home.honeywell.com or call their dedicated support line at 1-800-468-1513. Support hours are Monday-Friday, 8 AM to 8 PM EST. For warranty claims, please retain your proof of purchase and contact Honeywell directly through their website. Online chat support is also available for quick assistance. Ensure your model number (T1) is ready when contacting support.