
Cabinet Knob Placement Guide ⏤ An Overview
Strategic knob placement significantly impacts both the functionality and aesthetic appeal of your cabinetry, influencing user experience and overall kitchen design․
Generally, two to three inches from the door’s edge is standard, though adjustments are often needed based on door style and hardware size․
Horizontal centering on door stiles is almost universally practiced, creating visual balance and ease of access for all cabinet configurations․
Date of information: 12/17/2025 21:14:05 ()
Understanding Standard Placement
Traditionally, cabinet knob placement adheres to a fairly consistent guideline, prioritizing both ergonomics and visual harmony within the kitchen space․ The most widely accepted standard dictates positioning knobs or pulls two to three inches from the edges of a cabinet door or drawer front․ This measurement applies to slab doors – those without a frame – ensuring comfortable grip and operation․
This standard isn’t arbitrary; it’s rooted in the average hand span and the natural reach of a user․ Placing hardware within this range allows for easy access without requiring excessive stretching or awkward hand positioning․ However, it’s crucial to remember this is a starting point, not a rigid rule․
Factors like cabinet size, door style, and the specific design of the hardware itself can necessitate adjustments to this standard placement․ Understanding these nuances is key to achieving a polished and functional result․ The goal is always to create a seamless and intuitive user experience․
Date of information: 12/17/2025 21:14:05 ()
Factors Influencing Knob Placement
Several key factors beyond the standard 2-3 inch rule significantly influence optimal cabinet knob placement․ Door style is paramount; flat-panel doors, lacking the natural frame of Shaker cabinets, often benefit from slightly adjusted positioning – perhaps 1․5 inches from the top and inward – especially when using micro knobs for a modern aesthetic․
Hardware size and profile also play a crucial role․ Larger, more substantial pulls may require greater spacing, while smaller, low-profile knobs can be positioned closer to the edge․ The overall kitchen style impacts decisions; a traditional kitchen might favor symmetrical placement, while a contemporary design allows for more creative freedom․
Finally, cabinet size matters․ Smaller cabinets may necessitate adjustments to maintain proportionality and ease of use․ Considering these elements ensures a harmonious blend of functionality and visual appeal․
Date of information: 12/17/2025 21:14:05 ()
Placement on Cabinet Doors
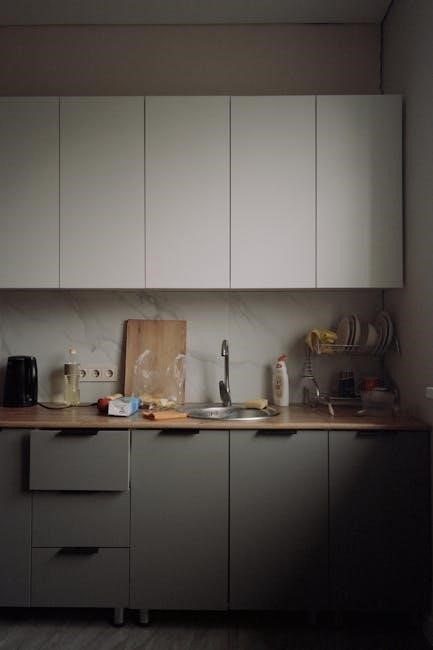
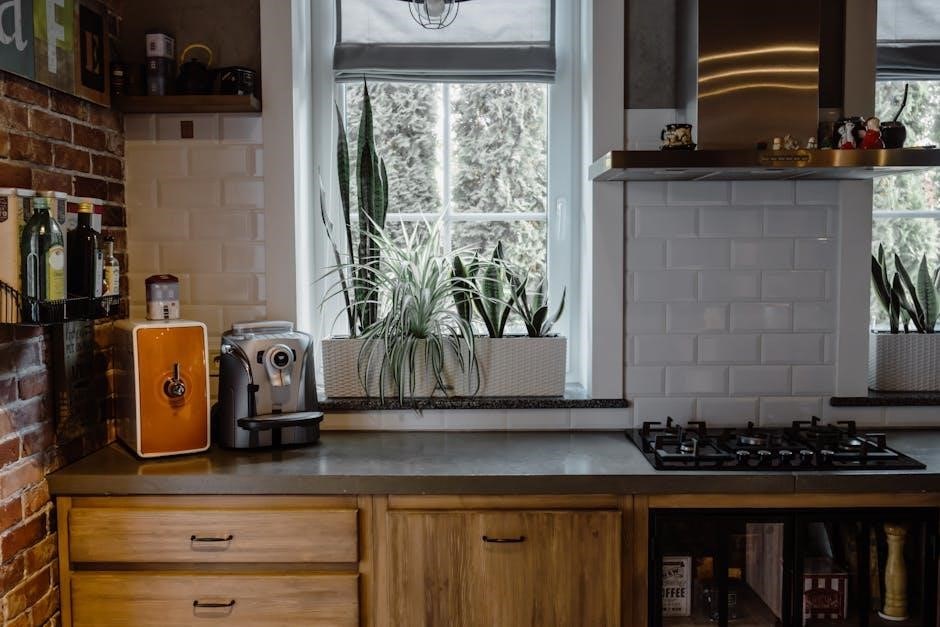
Cabinet door knob placement typically involves positioning hardware two to three inches from the edges, ensuring comfortable access and a balanced appearance․
Date of information: 12/17/2025 21:14:05 ()
Standard Placement: 2-3 Inches
The widely accepted standard for cabinet knob placement on doors dictates positioning the hardware between two and three inches from both the top and side edges of the cabinet door․
This measurement provides a comfortable and ergonomic grip for most users, facilitating easy opening and closing of the cabinet․
KraftMaid specifically recommends this range for slab doors, ensuring accessibility without compromising the door’s structural integrity․
However, this isn’t a rigid rule; adjustments are frequently made based on door style, knob size, and personal preference․
For instance, smaller “micro” knobs may benefit from slightly adjusted placement to maintain visual proportionality and ease of use․
Ultimately, the goal is to achieve a harmonious balance between aesthetics and functionality․
Date of information: 12/17/2025 21:14:05 ()
Adjustments for Door Style ⸺ Flat Panel Doors
Flat panel doors, lacking the natural framing of shaker or raised panel designs, often require nuanced adjustments to standard knob placement․
Emily Henderson’s Mountain House Kitchen project demonstrates a successful deviation from the typical 2-3 inch rule, opting for approximately 1․5 inches from the top and 1 inch inward․
This closer placement was strategically chosen to complement the modern aesthetic of the “micro” knobs selected – smaller, lower-profile hardware․
The key consideration is visual balance; on flat surfaces, knobs can appear disproportionately far from the edges if placed according to standard guidelines․
Reducing the distance creates a more cohesive look, particularly with minimalist hardware․
Careful evaluation of knob size and overall kitchen style is crucial for achieving optimal results․
Date of information: 12/17/2025 21:14:05 ()
Micro Knob Considerations
Micro knobs, characterized by their small size and minimalist profile, necessitate specific placement considerations to maintain both functionality and aesthetic appeal․
Due to their reduced scale, standard placement guidelines – typically 2-3 inches from the cabinet edge – can sometimes appear unbalanced, making the knobs seem lost on the door or drawer front․
As showcased in Emily Henderson’s Mountain House Kitchen, a closer placement, around 1․5 inches from the top and 1 inch inward, can be more effective․
This adjustment brings the hardware into better proportion with the cabinet surface, enhancing visual harmony․
Furthermore, micro knobs often suit a more modern aesthetic, and closer placement reinforces this style․
Consider the overall design scheme and the size of the cabinet when determining the ideal position․
Date of information: 12/17/2025 21:14:05 ()
Horizontal Centering on Door Stiles
Horizontal centering of cabinet knobs and pulls on door stiles – the vertical frame pieces of cabinet doors – is a nearly universal practice in kitchen design․
This approach establishes visual balance and symmetry, contributing to a polished and professional appearance․
Regardless of whether you opt for knobs or pulls, centering them horizontally ensures a cohesive look across all cabinet doors within a space․
This guideline applies to various door styles, from traditional raised-panel doors to contemporary slab designs․
Centering isn’t merely aesthetic; it also optimizes ease of use, providing a comfortable and intuitive grip․
Consistent horizontal alignment creates a sense of order and intentionality in the kitchen layout․
TaylorCraft Cabinet Door Company emphasizes this practice as a fundamental aspect of cabinet hardware installation․
Date of information: 12/17/2025 21:14:05 ()

Placement on Drawers
Drawer hardware can be centered both left-to-right and top-to-bottom, or centered horizontally with consistent placement for all drawers in the kitchen․
Date of information: 12/17/2025 21:14:05 ()
Centered Placement ⏤ Left to Right
Achieving horizontal centering on drawers is a foundational principle in cabinet hardware placement, ensuring a visually balanced and ergonomically sound design․ This approach involves positioning the knob or pull precisely in the middle of the drawer front, creating symmetry and ease of access․
Regardless of the drawer’s width, the goal is to find the midpoint and align the hardware accordingly․ This is particularly important for kitchens with varying drawer sizes, as consistent left-to-right centering maintains a cohesive aesthetic throughout the space․
Many designers recommend this method as a standard practice, offering a clean and uncluttered look․ It’s a versatile technique suitable for diverse kitchen styles, from traditional to contemporary․ Consistent centering also simplifies the installation process, ensuring a uniform appearance across all drawers․
Date of information: 12/17/2025 21:14:05 ()
Centered Placement ⏤ Top to Bottom
Vertical centering of drawer hardware, while less common than left-to-right alignment, offers a distinct aesthetic and functional benefit․ This technique involves positioning the knob or pull equidistant from the top and bottom edges of the drawer front, creating a balanced visual weight․
However, it’s crucial to consider the drawer’s function when deciding on top-to-bottom placement․ For drawers containing taller items, a slightly lower placement might provide easier access․ Conversely, for shallower drawers, centering can enhance the overall proportions․
Some designers opt for consistent top-to-bottom centering in conjunction with left-to-right centering for a symmetrical and refined look․ This approach works particularly well with modern cabinetry designs․ It’s important to note that this method may require precise measurements to ensure a harmonious appearance across all drawers․
Date of information: 12/17/2025 21:14:05 ()
Variations in Drawer Hardware Placement
Beyond standard centering, creative drawer hardware placement can introduce personality and visual interest․ One variation involves offsetting the hardware slightly upwards or downwards, particularly effective with deeper drawers where a higher grip point is advantageous․
Another approach utilizes dual knobs or pulls, spaced evenly across the drawer front, offering both aesthetic appeal and enhanced functionality for larger drawers․ This is especially useful for heavy-duty drawers containing cookware or utensils․
Consider the drawer’s contents and usage patterns when exploring variations․ For example, cutlery drawers might benefit from a lower placement for easier access, while linen drawers could utilize a higher position․ Ultimately, the goal is to balance aesthetics with practicality, creating a customized and user-friendly kitchen․
Date of information: 12/17/2025 21:14:05 ()

Specific Scenarios & Considerations
Unique cabinets and hardware require tailored placement strategies; small cabinets benefit from proportionally sized knobs, while modern styles embrace micro-knobs․
Date of information: 12/17/2025 21:14:05 ()
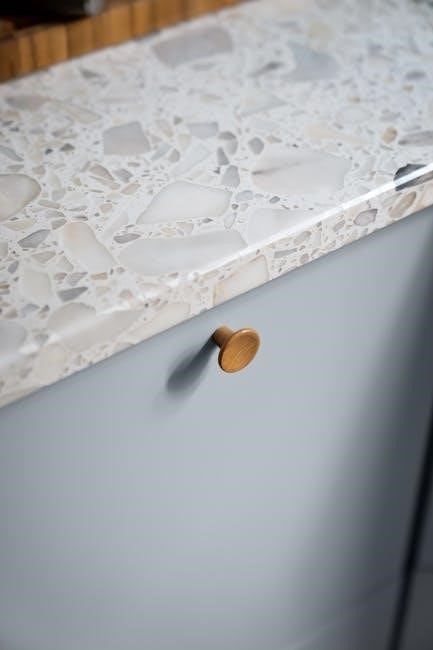
Placement on Small Cabinets
Small cabinet doors present unique challenges for knob placement, demanding careful consideration to maintain both functionality and aesthetic harmony․ Due to the reduced surface area, standard 2-3 inch measurements might appear disproportionately far from the edges, creating an unbalanced look․
Instead, consider reducing the distance to 1․5-2 inches, particularly with smaller knobs or pulls․ This brings the hardware closer to the hand, improving accessibility and visual proportionality․ For very narrow cabinets, centering the knob horizontally is crucial, even if it means slightly adjusting the vertical placement․
Micro knobs are particularly well-suited for small cabinets, as their smaller profile minimizes visual clutter and complements the cabinet’s size․ Prioritize a comfortable grip and ensure the knob doesn’t interfere with adjacent cabinets or appliances․ Thoughtful placement enhances the overall design, making even small cabinets feel intentional and well-designed․
Date of information: 12/17/2025 21:14:05 ()
Placement with Unique Hardware
Non-standard cabinet hardware – think oversized pulls, decorative knobs, or unconventional shapes – necessitates a departure from traditional placement guidelines․ The goal is to showcase the hardware’s unique design while maintaining functionality․
For larger pulls, slightly increasing the distance from the cabinet edge can prevent them from appearing cramped․ Conversely, delicate or intricately designed knobs may benefit from closer placement to emphasize their detail․ Consider the hardware’s profile; lower-profile knobs, like micro knobs, often look best placed closer to the cabinet surface․
Experimentation is key․ Temporarily tape the hardware in different positions before drilling to visualize the best look․ Ensure the placement allows for a comfortable and secure grip, and that the hardware doesn’t interfere with adjacent cabinets or appliances․ Prioritize balance and visual harmony, letting the unique hardware become a focal point․
Date of information: 12/17/2025 21:14:05 ()
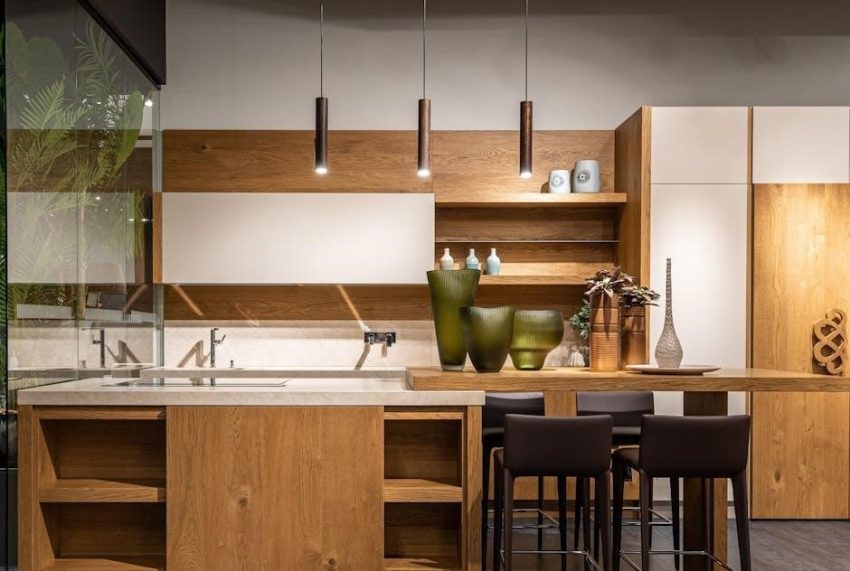
Considerations for Different Kitchen Styles
Kitchen style profoundly influences optimal cabinet knob placement․ Traditional kitchens often benefit from symmetrical and classic positioning – typically 2-3 inches from the edge, emphasizing formality and balance․
Modern and contemporary kitchens lean towards minimalist aesthetics․ Here, slightly adjusted placement – perhaps a bit closer to the top or inward – can complement sleek cabinet designs and lower-profile hardware․ Micro knobs, popular in modern designs, often look best with closer placement․
Farmhouse and rustic kitchens allow for more flexibility․ A slightly more relaxed approach to symmetry can enhance the charming, informal feel․ Consider hardware scale; larger knobs may require a bit more space to avoid looking crowded․ Ultimately, the goal is to complement the kitchen’s overall character and create a cohesive look․
Date of information: 12/17/2025 21:14:05 ()

Tools & Techniques for Accurate Placement
Precise placement requires a template, measuring tape, and marking tools; consistency is key for a professional finish and uniform appearance across all cabinets;
Date of information: 12/17/2025 21:14:05 ()
Using a Template
Creating a template is arguably the most effective method for ensuring consistent cabinet knob placement throughout your kitchen or bathroom project․ Begin by accurately measuring and marking the desired placement on a single cabinet door – typically 2-3 inches from the edges, or adjusted for flat panel designs as seen in the Mountain House Kitchen example, where 1․5 inches was utilized․
Construct a physical template using cardboard, plastic, or even a piece of wood․ This template should have pre-drilled holes or clear markings indicating the exact drill points for the screws․
The beauty of a template lies in its reusability․ Simply position the template on each subsequent cabinet door or drawer front, ensuring it’s aligned correctly, and use the markings to guide your drilling․ This eliminates the need for repeated measurements and minimizes the risk of errors, resulting in a polished and professional look․ A template streamlines the process, saving time and guaranteeing uniformity․
Date of information: 12/17/2025 21:14:05 ()
Measuring and Marking
Precise measurement is paramount for achieving aesthetically pleasing and functional cabinet knob placement․ Start by determining the desired distance from the cabinet door or drawer edges – the standard range is two to three inches, as recommended by KraftMaid, but consider variations for specific door styles․
Utilize a measuring tape and a pencil to carefully mark the screw hole locations on each cabinet component․ For consistent horizontal centering on door stiles, measure the width of the stile and find the midpoint․
Double-check all measurements before drilling! A small error can lead to misaligned knobs, detracting from the overall appearance․ Consider using a level to ensure markings are straight, especially on larger cabinets․ Accurate marking, combined with careful drilling, is the foundation of a successful cabinet hardware installation․
Date of information: 12/17/2025 21:14:05 ()
Ensuring Consistent Placement
Maintaining uniformity in cabinet knob placement is crucial for a polished, professional look․ Inconsistencies can be visually jarring and detract from the overall design․ Employing a template, as suggested in resources, is a highly effective method for replicating measurements across all cabinets and drawers․
Create a simple template from cardboard or sturdy paper, marking the precise screw hole locations․ Then, transfer these markings to each cabinet door and drawer front․ This minimizes errors and guarantees consistent spacing․
Regularly verify the template’s accuracy throughout the installation process․ Small adjustments may be necessary due to slight variations in cabinet construction․ Consistent placement elevates the aesthetic and demonstrates attention to detail․
Date of information: 12/17/2025 21:14:05 ()
Troubleshooting Common Issues
Misaligned knobs or hardware interference can occur; carefully reassess measurements and ensure proper screw length․ Adjusting existing placement might require patching holes․
Date of information: 12/17/2025 21:14:05 ()
Misaligned Knobs
Misaligned cabinet knobs are a common frustration during installation or renovation, often stemming from inaccurate initial measurements or inconsistencies during the marking and drilling process․ If you find knobs aren’t perfectly aligned, don’t immediately assume the doors or drawers are the issue; double-check your measurements against the original plan․
Begin by carefully assessing the misalignment – is it a consistent offset across multiple cabinets, or isolated to a few? Consistent misalignment suggests an error in your initial template or measuring technique․ For isolated instances, the issue might be a slightly warped door or drawer front, requiring gentle adjustments during installation․
If screws are stripped or holes are slightly off, consider using wood filler to create a solid base for re-drilling․ Ensure the filler is fully dried and sanded smooth before attempting to install the knob again․ Precise marking and slow, controlled drilling are crucial to avoid further misalignment․ Remember, patience and attention to detail are key to achieving a professional finish․
Date of information: 12/17/2025 21:14:05 ()
Hardware Interference
Hardware interference occurs when a cabinet knob or pull clashes with adjacent cabinets, drawers, or internal cabinet components, hindering smooth operation or creating an unsightly appearance․ This is particularly common in kitchens with limited space or complex cabinet configurations․
Before drilling, meticulously assess the swing radius of the door or drawer, ensuring the knob won’t collide with neighboring units when opened or closed․ Consider the depth of the knob – a protruding knob might interfere with access to adjacent cabinets․ If interference is anticipated, explore alternative hardware options with a lower profile or smaller diameter․
In some cases, minor adjustments to knob placement can resolve the issue․ However, if significant interference persists, you may need to reconsider the cabinet layout or opt for different hardware altogether․ Prior planning and careful consideration of spatial relationships are essential to prevent hardware interference and ensure optimal functionality․
Date of information: 12/17/2025 21:14:05 ()
Adjusting Existing Knob Placement
Adjusting existing knob placement can be necessary for aesthetic improvements or to rectify previous installation errors․ This process requires careful execution to avoid damaging the cabinet doors or drawers․ Begin by thoroughly cleaning the area around the existing holes to remove any debris or residue․
Carefully remove the existing knobs or pulls; Fill the original holes with wood filler, allowing it to dry completely before sanding it smooth and flush with the cabinet surface․ This creates a clean slate for re-drilling․ Accurately measure and mark the desired new knob placement, ensuring alignment and symmetry․

Drill new pilot holes, followed by the appropriate size holes for the new hardware․ Finally, install the new knobs or pulls, tightening them securely․ Remember to use a level to confirm proper alignment and ensure a professional finish․
Date of information: 12/17/2025 21:14:05 ()
Resources & Further Reading
For continued learning and inspiration regarding cabinet knob placement, several online resources offer valuable insights․ Emily Henderson’s blog (https://stylebyemilyhenderson․com) provides practical advice, including adjustments for flat-panel cabinets, suggesting a placement around 1․5 inches from the top and 1 inch inward for micro knobs․
KraftMaid (https://www․kraftmaid․com) offers detailed guidelines, recommending 2-3 inches from the edge of slab doors․ TaylorCraft Cabinet Door Company (https://www․taylorcraft․com) emphasizes horizontal centering on door stiles for visual balance․
Exploring home design forums and consulting with professional kitchen designers can also provide tailored recommendations based on your specific cabinet style and preferences․ Remember to consider the overall aesthetic and functionality when making your final decisions․
Date of information: 12/17/2025 21:14:05 ()