
Camera-ready makeup ensures you look flawless in photos, enhancing natural beauty while withstanding studio lights. Learn essential steps and techniques for a polished, professional appearance in portraits or photoshoots.

Preparing Your Skin
Healthy, well-prepped skin is the foundation of camera-ready makeup. Moisturize thoroughly, apply primer, and ensure even tone for a smooth, long-lasting base that enhances your natural beauty.
2.1 Moisturizing
Moisturizing is the first essential step in prepping your skin for camera-ready makeup. It ensures a smooth, hydrated base and prevents dry patches that can accentuate under lighting. Choose a moisturizer suited to your skin type—hydrating for dry skin, lightweight for oily, and SPF-infused for daily protection. Apply a pea-sized amount evenly across your face, gently massaging it upward and outward to boost circulation. Allow the moisturizer to absorb fully before moving on to primer, as this helps create a seamless canvas for makeup. Proper hydration ensures your skin looks plump and radiant, making your makeup appear more natural and flawless in photos. For optimal results, apply moisturizer 5-10 minutes before primer to allow full absorption. This step is crucial for achieving a polished, professional finish in your makeup look.
2.2 Applying Primer
Applying primer is a critical step in creating a camera-ready makeup look. It acts as a protective barrier between your skin and makeup, ensuring a smooth, even application. Choose a primer that suits your skin type—matte for oily skin, hydrating for dry skin, or illuminating for a radiant glow. Using clean fingers or a brush, apply a small amount evenly across your face, focusing on areas where makeup tends to cake or fade. Gently blend it into the skin, avoiding the delicate under-eye area. Allow the primer to set for about a minute before proceeding with foundation. A good primer minimizes pores, reduces oiliness, and extends the longevity of your makeup, ensuring it looks flawless in photos. This step is essential for achieving a professional, polished finish in your makeup routine.
Tools and Brushes
Having the right tools and brushes is essential for achieving a polished, camera-ready makeup look. Invest in high-quality brushes made from natural or synthetic fibers, as they pick up and blend products more effectively. A flat foundation brush or a beauty blender is ideal for applying foundation smoothly. Concealer brushes with precise tips help target small areas like blemishes or dark spots. For eyeshadow, use fluffy brushes for blending and smaller, denser ones for packing color onto the lids. Angled brushes are perfect for creating sharp lines with eyeliner or brow products; Don’t forget to sanitize your tools regularly to prevent breakouts and maintain hygiene. Clean brushes ensure better product application and a more flawless finish. Properly caring for your tools will extend their lifespan and enhance your makeup results.
Foundation Application
Apply foundation with a brush or damp sponge for a smooth, even base. Blend thoroughly, starting in the center of your face and working outward. Build coverage as needed for photography, ensuring a natural finish. Set with powder for lasting results in pictures.
4.1 Choosing the Right Shade
To select the perfect foundation shade for photography, start by identifying your skin’s undertones: cool (pink), warm (yellow), or neutral (balanced). Test foundation on your jawline in natural light to ensure a seamless match. Consider seasonal skin tone changes and opt for a shade that complements your natural color. If unsure, mix two shades to create your ideal match. For photography, choose a formula that offers buildable coverage and sets well with powder to maintain a flawless look. Avoid shades that oxidize excessively and ensure the foundation complements your skin type, whether oily, dry, or combination. Finally, seek professional advice for personalized recommendations to ensure your base looks perfect in pictures.
4.2 Application Techniques
Mastering foundation application is key for a camera-ready look. Start by applying small dots of foundation across your face, then blend with a beauty blender, brush, or fingertips. Use light, sweeping motions for a natural finish. For full coverage, press the product into the skin with a brush or blender. Avoid heavy application around the edges, as cameras can emphasize excess product. Blend well into the hairline, jawline, and neck for a seamless look. Use a damp beauty blender for an airbrushed effect or a brush for precision. Build coverage gradually, ensuring even distribution. Set the foundation with powder to prevent oiliness in photos. Remember, the goal is soft, even coverage that looks natural under bright lights or flashes.
The Eyes
Eyes are a focal point in photos. Define them with makeup to enhance shape and depth, ensuring a polished, camera-ready look under any lighting.
5.1 Eyeshadow
Start with a light, neutral base color across your lid to brighten the area. Use a medium shade in the crease for depth, blending softly to avoid harsh lines. Apply a darker shade along the outer corner for dimension. Highlight the brow bone with a shimmery light shade to make eyes appear larger. For photos, opt for matte or subtle shimmer finishes to avoid excessive glare. Blend thoroughly to ensure a seamless transition between colors. Use a small brush for precise application in the crease and a fluffier brush for blending. Avoid overloading the brush with product to prevent cakeiness. Set the eyeshadow with a light dusting of translucent powder to prevent creasing. This creates a polished, camera-ready look that lasts all day.
5.2 Eyeliner
Apply eyeliner to define your eyes for photos. Start by lining the upper lash line with short, steady strokes, beginning from the inner corner to the outer edge. For a more dramatic look, slightly wing the liner at the outer corner. Use a liquid or gel eyeliner for precision and a sharp, clean finish. Avoid thick lines, as they can appear heavy in photos. Tightline the upper waterline sparingly to add depth without looking unnatural. For a softer effect, smudge a pencil liner along the lower lash line. Ensure the liner complements your eye shape and is balanced with the rest of your makeup. Set the liner with a light dusting of translucent powder to prevent smudging. This creates a sharp, polished look that enhances your eyes in photographs.
5.3 Mascara
Enhance your lashes with mascara to make your eyes stand out in photos. Start by curling your lashes to lift and open up your eyes. Hold the mascara wand at the base of your lashes and wiggle it upward to coat evenly. Focus on the outer lashes to create a more defined look. Avoid clumping by combing through your lashes with a clean spoolie after application. Use a waterproof formula to prevent smudging under bright lights or humidity. For a natural look, apply one coat; for a glam look, layer two coats. Ensure the mascara is fully dry before taking photos to avoid smudging. This step adds depth and drama to your eyes, making them pop in pictures.
Brows
Groomed brows are essential for framing your face in photos. Start by trimming or waxing to maintain shape, but avoid over-plucking, as natural brows look best. Use a brow pencil or powder to fill sparse areas, matching your natural brow color for a subtle look. Light strokes mimic hair, creating a realistic effect. Avoid over-filling to prevent an artificial appearance. Comb brows into place with a spoolie to blend and set. For extra hold, apply clear brow gel to keep hairs in place all day. Defined brows add structure and balance to your face, enhancing your features in pictures. Keep your brow shape natural or slightly arched to complement your face shape. Well-defined brows complete your makeup look, ensuring a polished appearance in photos.

Lips
Your lips are a focal point in photos, so defining them is key. Start by lining your lips with a pencil that matches your natural lip color to create a base and prevent feathering. Fill in your lips with a lipstick, gloss, or lip balm that complements your skin tone. Matte finishes are ideal for photos as they avoid excessive shine. For a precise application, use a lip brush to paint the edges neatly. Blot gently with a tissue to remove excess product and ensure long-lasting wear. Avoid overlining, as it can look unnatural in photos. For a subtle look, opt for nude shades, or go bold with a statement color to draw attention. Set your lips with a light dusting of translucent powder to keep them camera-ready all day.
Contouring and Highlighting
Contouring and highlighting enhance your facial structure by creating depth and dimension. Use a contour powder or cream one shade darker than your foundation to define areas like the hollows of your cheeks, sides of your nose, and jawline. Apply it with a angled brush for precise placement. Highlighter, applied to high points such as the tops of your cheekbones, brow bone, and cupid’s bow, adds radiance. Blend thoroughly to avoid harsh lines, ensuring a seamless transition. For photos, opt for a natural contour and a subtle highlight to avoid overly dramatic results. Set everything with a setting spray to maintain the look and prevent movement under camera lights. This step ensures your features pop in pictures while keeping your makeup polished and professional.
Blush
Blush adds a healthy, natural-looking flush to your cheeks, enhancing your complexion in photos. Choose a shade that complements your skin tone—peach for fair skin, soft pink for medium tones, and berry shades for deeper complexions. Apply blush to the apples of your cheeks, the areas just above the corners of your mouth, using a fluffy brush. Gently sweep the color upward and outward toward your temples for a lifted look. Avoid overapplying, as it can appear too harsh in pictures. Blend well to create a soft, seamless finish. For photography, opt for a matte or satin finish to avoid excess shine. Set your blush with a light dusting of translucent powder to ensure it lasts and looks vibrant under camera lights. This step adds warmth and life to your face, balancing your overall makeup look.
Setting Your Look
Setting your makeup is essential for ensuring it lasts and looks flawless in photos. Use a translucent powder to set liquid or cream products, focusing on oily areas like the T-zone. Gently sweep a powder brush across your face, avoiding heavy application to prevent cakeiness. For added longevity, finish with a setting spray, which helps maintain your look and prevents oxidation of products under camera lights. Choose a spray that suits your skin type—matte for oily skin or radiant for dry skin. This step ensures your makeup stays fresh and camera-ready, preventing smudging or fading during photo sessions. Proper setting enhances the overall finish and keeps your look polished and professional.
Tips for Natural vs. Glam Looks
For a natural look, opt for light coverage and soft colors. Glam looks require bold, dramatic elements like dark eyeshadows, thick eyeliner, and vibrant lipstick. vs. glam tips help create the perfect aesthetic for any occasion.
11.1 Natural Makeup Look
A natural makeup look is all about enhancing your features while maintaining a fresh, effortless appearance. Start with a light to medium coverage foundation that matches your skin tone to create a seamless base. Concealer should be applied sparingly to cover dark circles or blemishes, blending well to avoid any noticeable lines. For the eyes, opt for soft, neutral eyeshadows in shades like beige or light brown, applying them lightly across the lid and crease. Define your lashes with a coat or two of mascara, but avoid heavy liner for a more subtle effect. Keep your brows groomed but natural, using a brow pencil or powder only where needed. On the lips, choose a tinted balm or a nude gloss for a soft, everyday look. Tip: Blend, blend, blend! Soft transitions between colors create a more natural finish. For photography, ensure your makeup is well-blended and set with a light dusting of powder to avoid any cakey appearance in photos. Avoid heavy contouring or bold lip colors, as they can look dramatic in pictures. Instead, focus on enhancing your natural beauty with minimal products and light-handed application. This approach ensures you look polished yet authentic, perfect for capturing timeless moments.
11.2 Glam Makeup Look
A glam makeup look is perfect for making a statement in photos. It’s all about creating drama and definition while ensuring your features pop on camera. Start with a full-coverage foundation to even out your skin tone, and use concealer to brighten under the eyes and cover imperfections. For the eyes, go bold with dark eyeshadows in the crease, metallic shades on the lid, and a sharp, winged eyeliner to add depth. Coat your lashes with volumizing mascara or opt for false lashes for extra glamour. Define your brows with a pencil or pomade for a polished look. Contour your cheekbones, jawline, and temples with a bronzer or contour powder to create structure. Highlight the high points of your face for a radiant glow. Finish with bold, matte lips in a deep shade like red or berry. Tip: Layer your products for maximum impact, and set everything with a setting spray to ensure longevity and avoid shine in photos. This look is ideal for special occasions or when you want to stand out in your pictures.
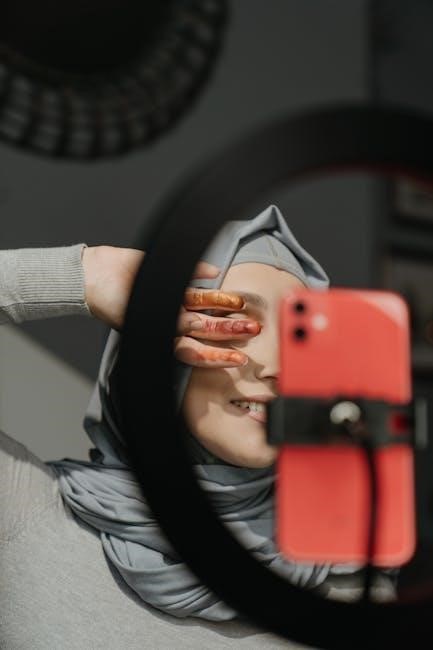
Lighting Considerations
Lighting plays a crucial role in how your makeup looks in photos. Natural light is often the most flattering, so try to take photos near a window or outside during the golden hour for soft, even illumination. Avoid harsh direct sunlight, as it can create unflattering shadows. If using artificial light, opt for soft, diffused sources like ring lights or softbox lights, which minimize stark lines and highlights. Position the light slightly above eye level to create a slimming effect and reduce double chin appearances. Avoid overhead lighting, as it can accentuate imperfections. Experiment with angles to find the most flattering light for your face shape. For a glamorous look, dramatic side lighting can add depth and contour. Always test the lighting setup before finalizing your photos to ensure your makeup looks its best on camera. Proper lighting enhances your features and ensures your makeup stands out in pictures. Tip: Use a light reflector or white card to bounce light onto shadowed areas for a balanced look.
Common Mistakes to Avoid
When mastering camera-ready makeup, avoiding common mistakes is key to achieving a flawless look. Over-powdering is a frequent error, as it can make the skin appear cakey and accentuate texture. Another mistake is not blending makeup properly, especially around the edges of the face. Failing to prime the skin or choosing the wrong foundation shade can also ruin the overall finish. Many people forget to set their makeup with setting spray, leading to smudging and oiliness. Applying too much product, such as heavy eyeshadow or excessive mascara, can look overwhelming on camera. Additionally, neglecting to define the brows or skipping contouring can make the face appear flat in photos. To avoid these errors, take your time during application and use light, buildable layers. Tip: Always blend, blend, blend, and ensure your makeup is seamless for a professional finish.
Mastering camera-ready makeup requires attention to detail, proper techniques, and practice. By following the steps outlined in this guide, you can create a flawless, photogenic look that enhances your natural beauty. Remember to prepare your skin, use the right tools, and blend thoroughly. Whether you’re aiming for a natural or glam look, consistency and patience are key. Don’t forget to set your makeup and consider lighting to ensure your hard work shines through. With these tips, you’ll be confident in front of the camera, knowing your makeup looks as good as it feels. Experiment with different techniques and products to find what works best for you. Happy snapping! Your perfect camera-ready look is just a brushstroke away.