
Contouring and highlighting are essential makeup techniques that enhance facial features by creating balance, depth, and dimension․ This guide provides a comprehensive approach to mastering these skills, ensuring a natural, polished look tailored to any face shape or skin type․ Perfect for beginners and makeup enthusiasts alike, it covers everything from basic principles to advanced tips, helping you achieve confidence and radiant beauty through expertly crafted contouring and highlighting․
1․1 What is Contouring and Highlighting?
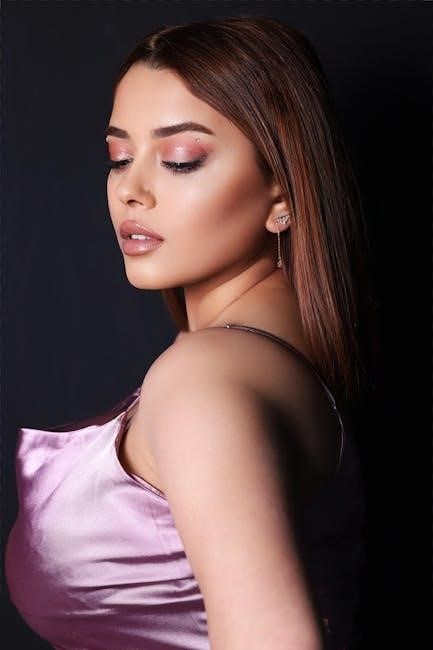
Contouring and highlighting are makeup techniques used to enhance facial features by creating depth and dimension․ Contouring involves applying darker shades to areas you want to recede, such as the sides of the nose or jawline, mimicking natural shadows․ Highlighting uses lighter shades to draw attention to areas like the cheekbones, nose, and cupid’s bow, giving a radiant glow․ Together, these techniques reshape and brighten the face, creating a balanced and polished look․ They work in harmony to define features, slim or widen areas, and achieve a natural or dramatic effect based on your desired outcome․
1․2 Importance of Contouring and Highlighting in Makeup
Contouring and highlighting are fundamental techniques in makeup that enhance facial structure by creating depth, balance, and dimension․ They help define features, slim or widen areas, and achieve a natural or dramatic look․ These techniques are versatile, suitable for various occasions and skin types․ By mastering contouring and highlighting, you can correct imbalances, enhance natural beauty, and create a polished, radiant appearance․ They are essential for anyone aiming to elevate their makeup routine and confidently showcase their best features․
1․3 Brief History of Contouring and Highlighting
Contouring and highlighting have roots in ancient theater, where actors used shading to define features under stage lights․ In the early 20th century, Hollywood makeup artists refined these techniques to create depth on film․ The 1960s and 70s saw a rise in creative makeup trends, with highlighting becoming part of glam looks․ The 2000s brought contouring into mainstream popularity, fueled by social media and influencers․ Today, these techniques are essential in personal and professional makeup routines, evolving from theatrical tools to everyday beauty practices with diverse products and methods․
Understanding Your Face Shape
Recognizing your face shape is crucial for effective contouring and highlighting․ Each shape—oval, round, heart, or square—has unique features that determine how products are applied to enhance natural beauty and create balance․
2․1 Identifying Your Face Shape
Identifying your face shape is the first step in mastering contouring and highlighting․ Measure your face to determine if it’s oval, round, heart-shaped, or square․ Oval faces are longer than wide, with balanced proportions․ Round faces are equal in length and width, with full cheeks․ Heart-shaped faces have a wider forehead and temples, tapering to a narrower chin․ Square faces feature a strong jawline and equal length and width․ Understanding your face shape helps tailor makeup techniques to enhance your natural features and create a balanced look․
2․2 How Face Shape Affects Contouring and Highlighting
Your face shape significantly influences how contouring and highlighting should be applied․ Oval faces require subtle techniques to maintain balance, while round faces benefit from angular contours to elongate․ Heart-shaped faces need focus on the lower half to soften the width, and square faces require softening of sharp angles․ Each shape demands tailored approaches to enhance natural features and create harmony․ Understanding these differences allows for a more personalized and effective makeup application, ensuring your contouring and highlighting efforts yield the most flattering results for your unique face shape․
2․3 Common Face Shapes: Oval, Round, Heart, Square
The four most common face shapes are oval, round, heart, and square․ Oval faces are balanced with symmetrical features, while round faces are wider across the cheeks and jawline․ Heart-shaped faces have a broad forehead and temples, narrowing at the chin․ Square faces are defined by strong, angular features and equal width across the forehead, cheeks, and jawline․ Understanding your face shape helps tailor contouring and highlighting techniques to enhance your natural features and create a balanced, harmonious look․ Each shape has unique characteristics that guide where to apply contour and highlight for the most flattering results․
Tools and Products Needed
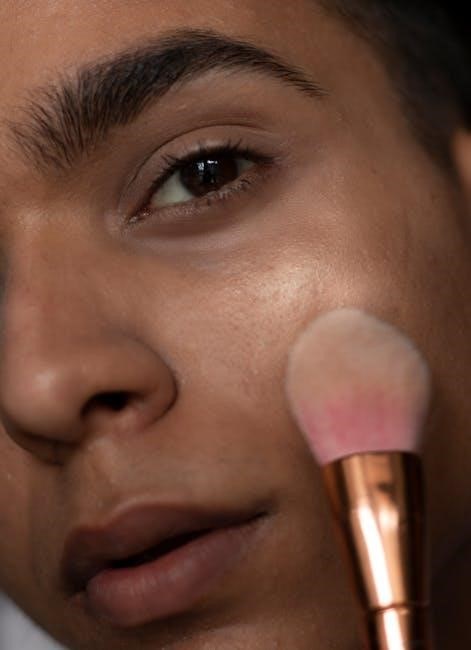
To master contouring and highlighting, you’ll need essential tools like angled brushes, blending sponges, and a contour kit․ Invest in a foundation, concealer, contour powder, and highlighter that match your skin tone for a seamless look․ Proper tools ensure precise application and blending, making it easier to achieve professional results at home․ Quality products and the right brushes are key to creating a polished, defined appearance․
3․1 Essential Brushes for Contouring and Highlighting
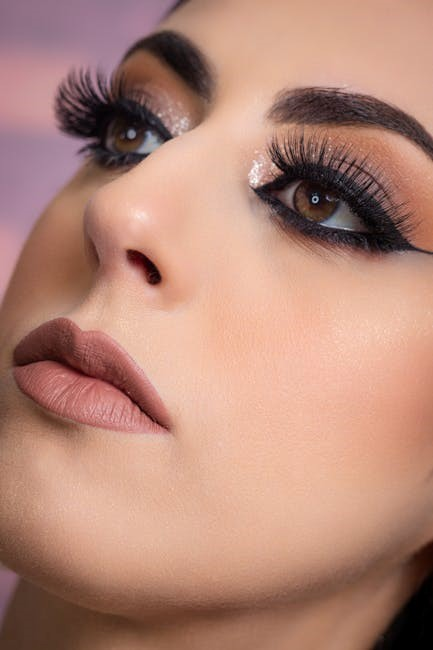
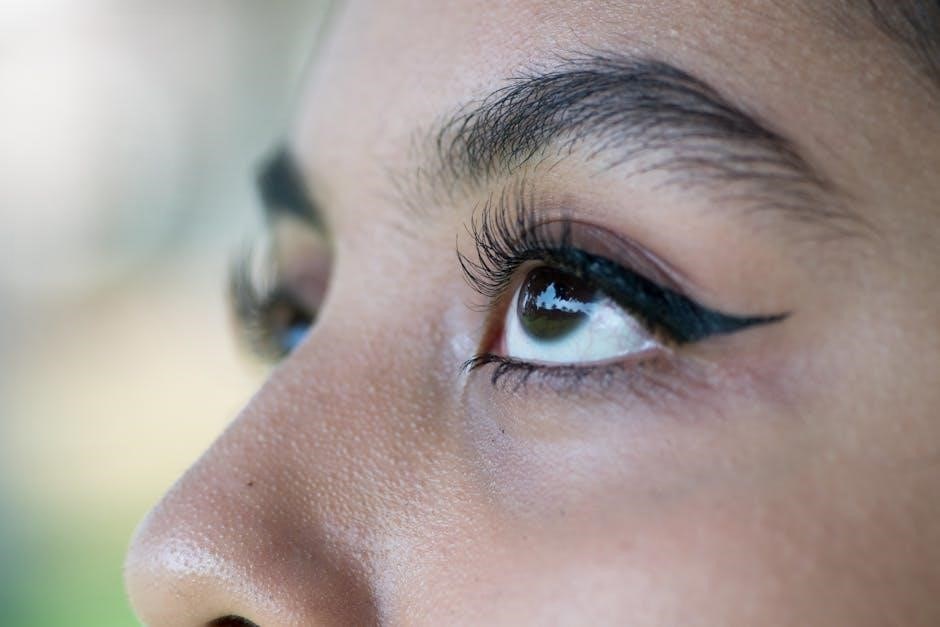
The right brushes are crucial for precise contouring and highlighting․ An angled brush is ideal for applying contour powder to defined areas like the hollows of the cheeks and jawline․ A smaller, flat brush works well for targeting smaller zones, such as the temples or sides of the nose․ For highlighting, use a soft, round brush to apply highlighter to high points like the tops of the cheekbones, brow bone, and cupid’s bow․ A blending brush or beauty sponge ensures seamless transitions between shades, preventing harsh lines․ Quality brushes enhance control and result in a professional finish, making them worth the investment․
3․2 Choosing the Right Contour and Highlight Products
Selecting the right contour and highlight products is key to achieving a natural, sculpted look․ For contour, opt for a shade 1-2 tones deeper than your foundation to mimic natural shadows․ Highlighters should complement your skin tone: peach for warm undertones, pink for cool tones, and champagne for neutral tones․ Consider your skin type—powder formulas suit oily skin, while creams are ideal for dry skin․ Ensure both products blend seamlessly and match your foundation shade for a cohesive look․ The right products enhance your features without appearing artificial, making them essential for effective contouring and highlighting techniques․
3․3 Importance of Proper Brush Care
Proper brush care is essential for maintaining hygiene and ensuring optimal makeup application․ Regularly wash your brushes with mild soap and warm water to remove dirt, oil, and bacteria․ Gently reshape bristles after cleaning and allow them to air dry to prevent damage․ Properly maintained brushes apply makeup more evenly, preventing cakey textures and uneven coverage․ Clean brushes also reduce the risk of skin irritation and breakouts․ Regular maintenance extends the life of your tools, ensuring they continue to perform well for precise contouring and highlighting․ Clean, well-cared-for brushes are vital for achieving professional-quality results․
Step-by-Step Contouring Guide
Learn to contour like a pro with this detailed guide․ Start by identifying key areas to shape and define, then apply product with precise strokes․ Blend seamlessly for a natural, sculpted look that enhances your features and creates depth․ Follow these steps to master the art of contouring and achieve a flawless, professional finish every time․

4․1 Preparing Your Skin for Contouring
Before contouring, ensure your skin is well-prepared for a smooth, even application․ Start with a gentle cleanser to remove dirt and impurities, followed by a hydrating moisturizer to create a balanced canvas․ Allow the moisturizer to absorb fully before applying a primer, which helps makeup stay in place and brings out the true color of your products․ A well-prepared skin base ensures that your contour and highlight will blend seamlessly, creating a natural, flawless finish․ Proper preparation is key to achieving professional-looking results․
4․2 Applying the Base: Foundation and Concealer
Apply a thin, even layer of foundation that matches your skin tone to create a uniform base․ Use a foundation brush or beauty blender for seamless coverage․ Concealer should be one shade lighter than your foundation, applied sparingly to cover dark spots, blemishes, and under-eye areas․ Blend thoroughly to avoid harsh lines․ This base ensures contour and highlight products adhere properly, enhancing the definition and natural look of your features․ A well-applied base is fundamental for a polished, professional finish in your makeup routine․
4․3 Contouring Techniques for Different Face Shapes
For oval faces, apply contour to the temples and jawline to maintain balance․ Round faces benefit from contouring the sides of the face and jawline to create length․ Heart-shaped faces should focus on softening the width by contouring the temples and base of the nose․ Square faces require contouring at the temples and jawline to soften sharp angles․ Each technique enhances natural features while creating definition․ Proper blending ensures a seamless look, making contouring effective for all face shapes․ Tailor your approach to complement your unique structure for a flattering, personalized result․

Step-by-Step Highlighting Guide
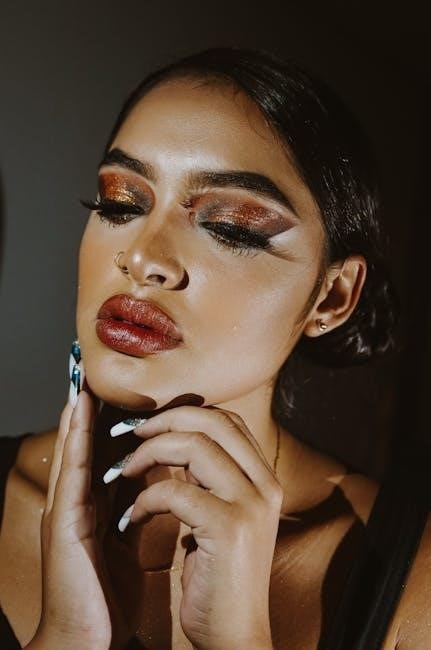
Highlighting enhances features by adding light to key areas for a natural glow․ Apply to cheekbones, brow bone, cupid’s bow, and T-zone with a matching shade․ Blend smoothly for a radiant, illuminated look, keeping it subtle and fresh․
5․1 Selecting the Right Highlighter Shade
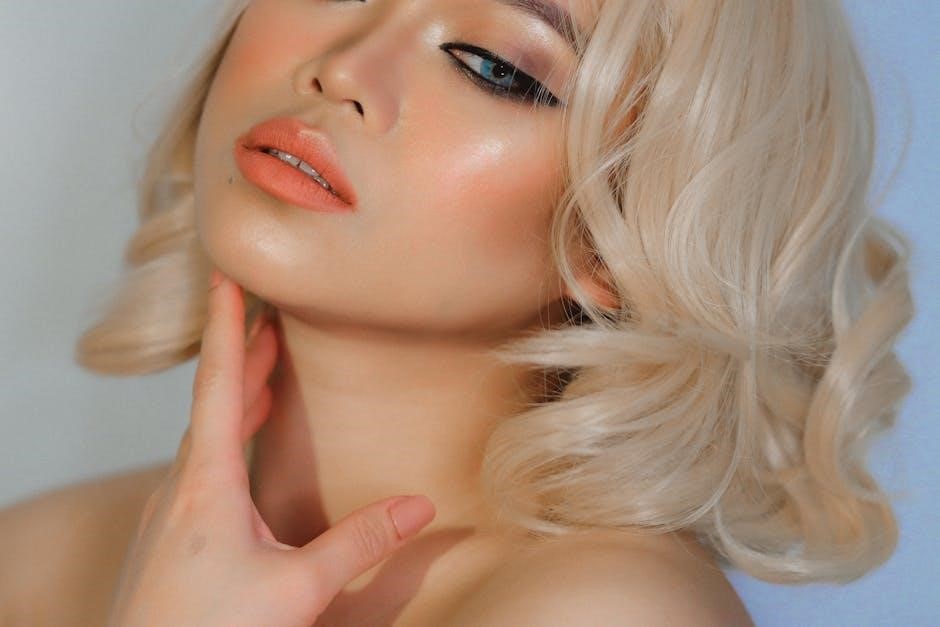
Choosing the right highlighter shade is crucial for a natural look․ Opt for a shade that complements your skin tone: peach or champagne for fair skin, golden for medium tones, and bronze or deep berry for darker skin․ Consider your makeup look—subtle for daytime, radiant for evening․ Test shades on your jawline or cheek to ensure a seamless match․ Avoid harsh contrasts; the highlighter should enhance, not overpower․ For a versatile option, sheer or buildable formulas are ideal for customizing your glow․ Proper shade selection ensures your highlighter blends effortlessly, creating a natural, lit-from-within effect․
5․2 Applying Highlighter to Key Areas
Highlighter is best applied to the high points of your face to create a radiant, lifted appearance․ Use a small makeup brush or a beauty blender to dab the highlighter onto areas like the tops of your cheekbones, brow bone, cupid’s bow, and the inner corners of your eyes․ For a subtle glow, apply a light layer and blend gently․ You can also add a small amount down the center of your nose for a slimming effect․ Start with a light hand and build coverage as needed, ensuring the highlighter complements your natural features without looking overly dramatic;
5․3 Blending Highlighter for a Natural Look
Blending is crucial for achieving a seamless, natural glow․ Use a fluffy brush or a damp beauty blender to gently merge the highlighter into your skin․ Start at the applied area and blend outward, feathering the edges for a soft transition․ Focus on areas like the tops of your cheekbones, brow bone, and cupid’s bow․ Lightly press the blender or brush to avoid moving too much product․ For a subtle effect, blend the highlighter toward the hairline or jawline․ Ensure the highlighter melts into your skin, creating a radiant finish that looks like it’s coming from within․ Avoid harsh lines by blending thoroughly, especially around the under-eye area․ This step ensures your highlighter enhances your features naturally, without appearing cakey or obvious․ Proper blending makes the difference between a professional and amateur application, so take your time to perfect this technique․ Remember, less is often more—start with a light layer and build as needed for a customized glow․ By mastering blending, you’ll achieve a flawless, lit-from-within appearance that complements your contouring efforts beautifully․ This final step ties your entire look together, ensuring your highlighter looks effortless and sophisticated․ With practice, blending will become second nature, allowing you to enjoy a polished, professional finish every time you apply highlighter․
Blending and Finishing Touches
Blending and finishing touches refine your contour and highlight, ensuring a seamless, natural look․ Use brushes or beauty blenders to soften harsh lines and set with powder for longevity․
6․1 The Importance of Blending in Contouring
Blending is crucial for creating a natural, seamless look when contouring․ Harsh lines can make your makeup appear artificial, while proper blending ensures a soft transition between shades․ By feathering the edges of your contour, you achieve a subtle definition that enhances your features without looking heavy․ Use light strokes with a brush or beauty blender to merge the contour into your skin․ This step is essential for maintaining a polished appearance and preventing noticeable makeup lines․ Well-blended contouring creates depth and dimension, making your makeup look effortless and professional․
6․2 Setting Your Look with Powder
Setting your makeup with powder is a vital step to ensure long-lasting results․ It helps mattify the skin, prevents oiliness, and sets the contour and highlight in place․ Using a light hand, apply a translucent or matching powder with a fluffy brush over the contoured areas․ This step enhances the definition created by the contour while maintaining a natural finish․ Properly setting your look with powder ensures your makeup stays fresh and polished throughout the day, even in challenging lighting conditions or humid environments․ It’s a simple yet essential step for a flawless, professional finish․
6;3 Final Touches: Enhancing Your Features
The final touches are where you refine and elevate your look․ Gently blend any harsh lines using a soft brush or beauty blender to ensure a seamless finish․ Apply a light layer of concealer under the eyes or on small areas to brighten and enhance definition․ For added radiance, dab a touch of highlighter on the cupid’s bow, inner corner of the eyes, or brow bone․ Finally, set everything in place with a setting spray to lock your contour and highlight, ensuring a long-lasting, professional finish that enhances your natural beauty․
Common Mistakes and Solutions
Common mistakes include over-contouring and under-highlighting․ Solutions involve using lighter shades, blending thoroughly, and starting with minimal product for a natural look․
7․1 Over-Contouring: How to Avoid It
Over-contouring can make your features appear harsh and unnatural․ To avoid this, start with light, buildable product and blend thoroughly․ Use a mirror to check your progress, ensuring contours look soft and subtle․ Choose shades that complement your skin tone, avoiding overly dark colors․ Remember, the goal is to enhance, not exaggerate, your natural structure․ By applying gentle strokes and blending well, you can achieve a seamless, professional finish that flatters your face without looking overly done․
7․2 Under-Highlighting: How to Fix It
Under-highlighting can leave your face looking flat and lacking dimension․ To fix this, apply a small amount of highlighter to key areas like the high points of your cheekbones, cupid’s bow, and brow bone․ Use a light hand and build gradually for a natural glow․ Blend well with a brush or beauty blender to ensure no harsh lines․ For a more noticeable impact, layer a lighter shade over your base highlighter․ Remember, the goal is to enhance your features subtly, so start with a little and add more as needed for a radiant finish․
7․3 Common Blending Mistakes and Corrections
One common blending mistake is applying too much product, leading to harsh lines․ To correct this, use a fluffy brush to soften edges, feathering the contour or highlight outward․ Another error is not blending enough, resulting in visible transitions․ Gently buff the areas with a light touch to merge colors seamlessly․ Over-blending can erase your contour, so stop once edges are soft․ For highlights, blend upward and outward to lift features․ Practice makes perfect—start with light layers and build gradually, ensuring a smooth, natural finish that enhances your face shape without looking artificial․
Advanced Techniques
Explore layering products for depth, using multiple highlighter shades for dimension, and adapting contouring to lighting conditions․ These methods refine your look, creating a polished, professional finish effortlessly․
8․1 Layering Products for a More Defined Look
Layering products enhances contouring and highlighting by building depth and dimension․ Start with a light base, then gradually intensify with darker shades․ Apply cream contour first for a natural base, followed by powder to set and define․ For highlights, layer a liquid illuminator under a powder highlighter to amplify radiance․ This technique ensures a seamless, sculpted finish that lasts all day․ Experiment with textures and shades to customize your look, adapting to your skin type and desired intensity․ Proper blending is key to achieving a flawless, professional appearance․
8․2 Using Multiple Highlighter Shades
Using multiple highlighter shades creates a more natural, radiant look by targeting different areas of the face․ Apply a light shade to the high points, such as the cheekbones and nose, for subtle illumination․ Use a medium shade to enhance areas like the cupid’s bow and brow bone․ For a more dramatic effect, layer a subtle shimmer highlighter over a cream base․ This technique adds depth and dimension while avoiding harsh lines․ Blend well for a seamless finish․ Experiment with shades to find what complements your skin tone and lighting conditions․ Layering highlighters ensures a polished, professional appearance every time․
8․3 Contouring for Different Lighting Conditions
Contouring techniques vary depending on lighting conditions to ensure a natural, flawless appearance; In natural light, use lighter, softer shades to mimic subtle shadows․ For artificial lighting, opt for slightly deeper tones to maintain definition without appearing too harsh․ When photographed, enhance contours more dramatically to create sharp, camera-ready angles․ Adjust your application based on the lighting intensity and angle to avoid over- or under-contouring․ Blend thoroughly to prevent visible lines, especially in bright conditions․ Tailor your contouring to the environment for a polished, professional look that adapts seamlessly to any setting or scenario․
Mastery of contouring and highlighting comes with practice․ Experiment with techniques, blend for natural looks, and embrace your unique beauty․ Confidence and creativity are key․
9․1 Recap of Key Contouring and Highlighting Tips
Mastering contouring and highlighting involves understanding your face shape, selecting the right products, and blending seamlessly․ Start with a smooth base, apply contour to create depth, and highlight to enhance features․ Use light strokes, build gradually, and blend thoroughly for a natural look․ Remember, practice makes perfect—experiment with techniques and products to find what works best for you․ Keep tools clean and skin prepped for optimal results․ Confidence and patience are your greatest allies in achieving a flawless, radiant finish․
9․2 Encouragement to Practice and Experiment
Embrace the journey of contouring and highlighting as a creative process that requires patience and practice․ Don’t be discouraged by initial results—every attempt brings you closer to mastering the techniques․ Experiment with different products, tools, and methods to discover what works best for your unique features․ Remember, there’s no one-size-fits-all approach, and it’s okay to make mistakes along the way․ Celebrate small victories and enjoy the transformative power of makeup․ With consistent effort, you’ll unlock a world of confidence and self-expression through contouring and highlighting․

9․3 Final Thoughts on the Importance of Contouring and Highlighting
Contouring and highlighting are more than just makeup techniques—they are tools for self-expression and empowerment․ By enhancing your natural features, these methods allow you to present your best self with confidence․ Whether you prefer a subtle, natural look or a dramatic transformation, contouring and highlighting offer versatility for every occasion․ Remember, makeup is a form of art, and your face is the canvas․ Embrace the process, celebrate your uniqueness, and let contouring and highlighting help you unlock your full potential and radiant beauty․